שלב א – התקנת סביבת פיתוח
הורידו והתקינו ארדווינו מהאתר
https://www.arduino.cc/en/software
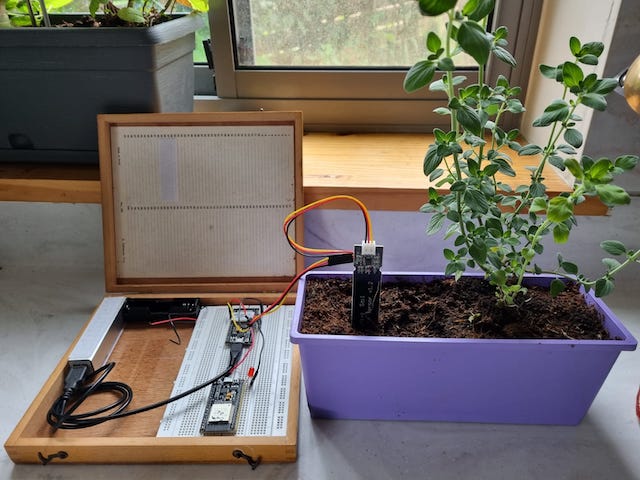
שלב ב – חיבור המעגל פיתוח
חברו את מעגל הפיתוח בעזרת הכבל למחשב
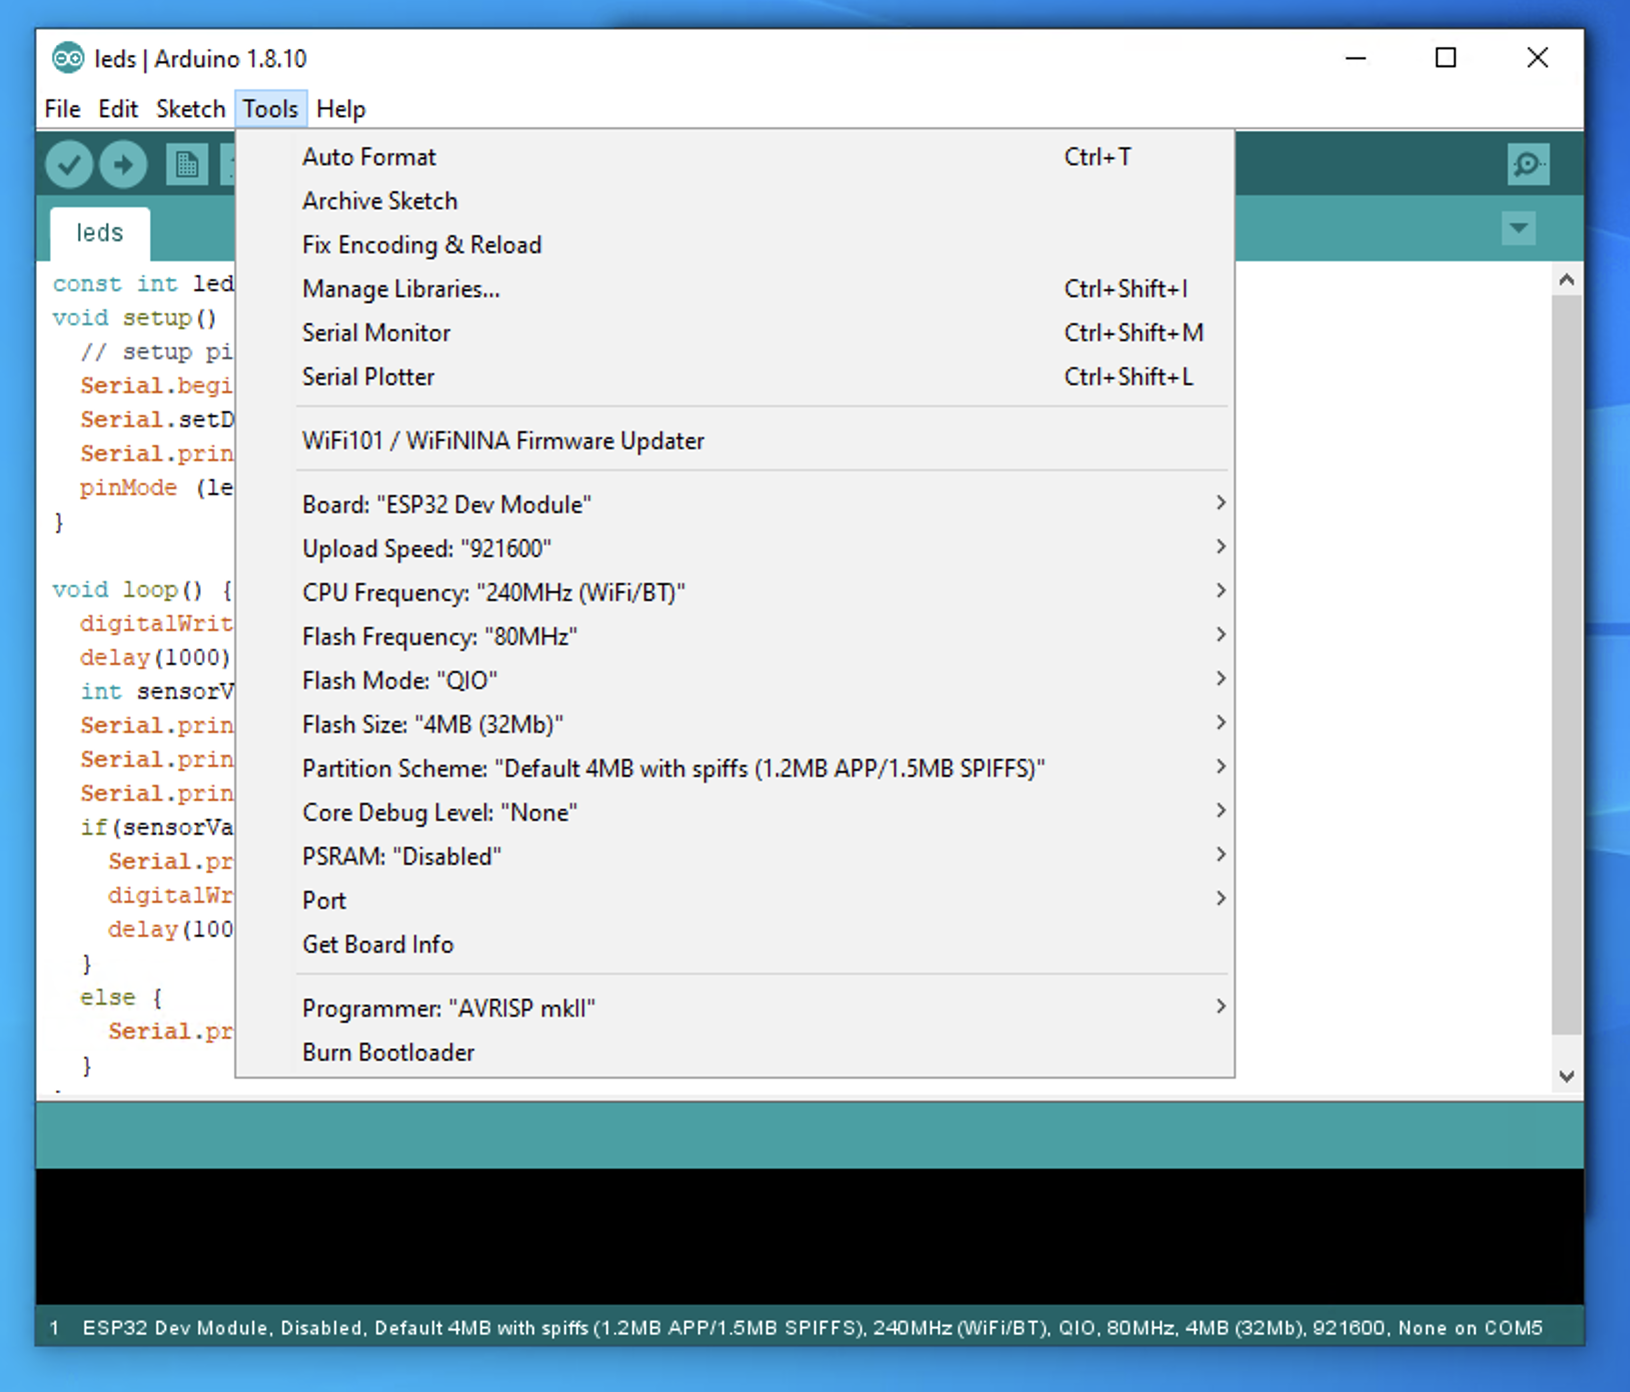
אלו ההגדרות שצריך לראות
שלב ג – הכינו את קוד הבדיקה לצורך כתיבה לצ׳יפ
#include "WiFi.h"
const int ledPin = 5;
void connectToWiFi()
{
// Wifi credentials
const char *WIFI_SSID = "******";
const char *WIFI_PASSWORD = "******";
WiFi.mode(WIFI_STA);
WiFi.begin(WIFI_SSID, WIFI_PASSWORD);
// Only try 15 times to connect to the WiFi
int retries = 0;
while (WiFi.status() != WL_CONNECTED && retries < 15){
delay(500);
Serial.print(".");
retries++;
}
// If we still couldn't connect to the WiFi, go to deep sleep for a minute and try again.
if(WiFi.status() != WL_CONNECTED){
esp_sleep_enable_timer_wakeup(1 * 60L * 1000000L);
esp_deep_sleep_start();
}
Serial.print("Connected to Network:");
Serial.println(WIFI_SSID);
}
void setup() {
// setup pin 5 as a digital output pin
Serial.begin(115200);
connectToWiFi();
Serial.setDebugOutput(true);
Serial.println("Start");
pinMode (ledPin, OUTPUT);
}
void loop() {
digitalWrite (ledPin, HIGH); // turn on the LED
delay(1000); // wait for half a second or 500 milliseconds
int sensorValue = analogRead(A0);//get the sensor read
Serial.print(F("sensorValue: "));
Serial.println(sensorValue);
Serial.print(F("Led Color: "));
if(sensorValue < 2800) {
Serial.println("Red");
digitalWrite (ledPin, LOW); // turn off the LED
delay(1000); // wait for half a second or 500 milliseconds
}
else {
Serial.println("Green");
}
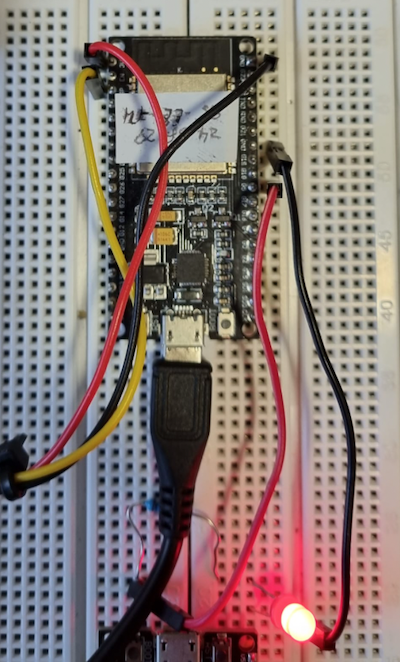
}שלב ד – העברת הקוד לצ׳יפ
שלב ה – מדידת הלחות באדמה והשקייה בהתאם